(705)733-5154
Dishwasher and fridge lines (ice makers)
When you need your dishwasher or fridge ice maker installed call us. we install dishwashers and fridge lines
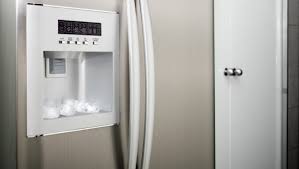
Fridge lines
Imagine the convenience of having cold water or ice cubes any time you want them -- no more filling up pitchers to keep in the refridgerator or waiting for ice cube trays to freeze. But once you've bought a refrigerator with a cold water dispenser and automatic ice maker, you'll still need a way to get water into it. It takes patience, but you can hook a water line up to your refrigerator on your own. Here's how .
-
Shut off the water supply.
-
Locate the cold water source closest to the refrigerator. You'll want to use water lines that are already in place if possible, rather than attempting to install new pipes.
-
Drill a hole either through the cabinet wall separating the space under the sink and the refrigerator or in the basement ceiling up to the refrigerator. Thread copper tubing through the hole you just drilled.
-
Attach one end of the copper tubing to the refrigerator's water pipe, using a nut and ferrule. Important: Make sure you leave extra tubing coiled behind the refrigerator, so you can move the refrigerator when necessary.
-
Cut the cold water line under the sink or in the basement and attach a copper T-fitting.
-
Attach a water valve to the T-fitting. This will control the water flow and water pressure to the refrigerator. Be sure to put a gasket seal between the valve and the T-fitting. Attach the free end of the copper tubing to the valve. Now the refrigerator is connected.
-
Clamp any tubing inside the cabinets along the back of the cabinets, to keep it in place.
-
Turn on the water supply. You should have cold water very shortly. You will have to wait 1-2 hours before you have ice.
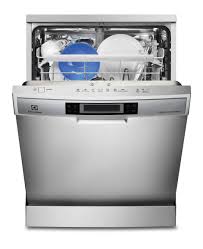
Dishwaher
Energy-efficient and water-saving dishwashers may have the most up-to-date technology, but thankfully they have the same three basic connections dishwashers have been using for decades: a water supply, a drain line, and an electrical hookup. That means if you're replacing a dishwasher, you only need to break these connections from the old appliance and reattach them to the new one. (Shut off power at the breaker panel and close the hot-water valve under the sink first, and be sure to unscrew the old unit from the underside of the counter before pulling it out.)
The existing electrical wiring is still good, but both plumbing lines should be replaced. Dishwashers come with drain hoses, but you'll need to buy a supply pipe—preferably copper tubing, which TOH plumbing and heating expert Richard Trethewey uses instead of braided steel. "Copper is time-proven," says Richard. "Inside a braided line is rubber, which can eventually fail. Copper lasts 60 to 80 years—longer than any dishwasher."
Though traditionally dishwashers get hooked up to the hot-water supply, you can save even more energy by connecting to the cold water because the heating element in the dishwasher uses less power than a water heater. However, check manufacturers' literature—some companies' models must be supplied with hot water.
The most difficult part of the installation may be snaking the copper tubing through the cabinet without kinking it. An invaluable tool for this is a tube-bending spring, which fits either inside the pipe or around it and bends it with even pressure. But Richard points out that it's the easiest of the connections—the drain line—that actually causes the most trouble. It must be installed strapped up high in an upside-down U to prevent sink backflow from going into the dishwasher. Also, if you're installing a model that sits flush with the front of the cabinets, you may have to drill new, lower holes from the dishwasher bay to the supply valve so the plumbing lines snake along a narrow inset at the back of the unit, allowing you to push it all the way to the wall.
Luckily, the electrical connection is fairly straightforward; just make sure to clamp the wires - be they metal-sheathed BX cable or vinyl-wrapped Romex - to the unit's junction box. This protects against electrocution should there be any leaks.